
No one wants to think of harvest’s end as the garden reaches peak, but now’s the time to plan for cover crops.
If you’re not acquainted with cover crops, here’s the rundown: These hardworking plants can add organic matter and aerate the soil, protect it from compaction caused by rain, suppress weeds and reduce erosion — some even add nitrogen to the soil, according to Nick Andrews, small farms specialist for the Oregon State University Extension Service.
Not a bad deal for an almost no-maintenance plant. All that’s needed is to seed it in fall, water a couple of times until the rains start, leave it through winter and dig or till it in spring. However, timing is key. You want to get overwintering cover crops seeded by September or early October so they get established before the weather turns cold and wet. It’s also important that plants are cut or mown down in spring before they set seed. Do this about four weeks before planting vegetables again so the crop decomposes properly.
“It all depends on when you need to get your vegetables in,” Andrews said. “It’s best to let cover crops decompose before you plant.”
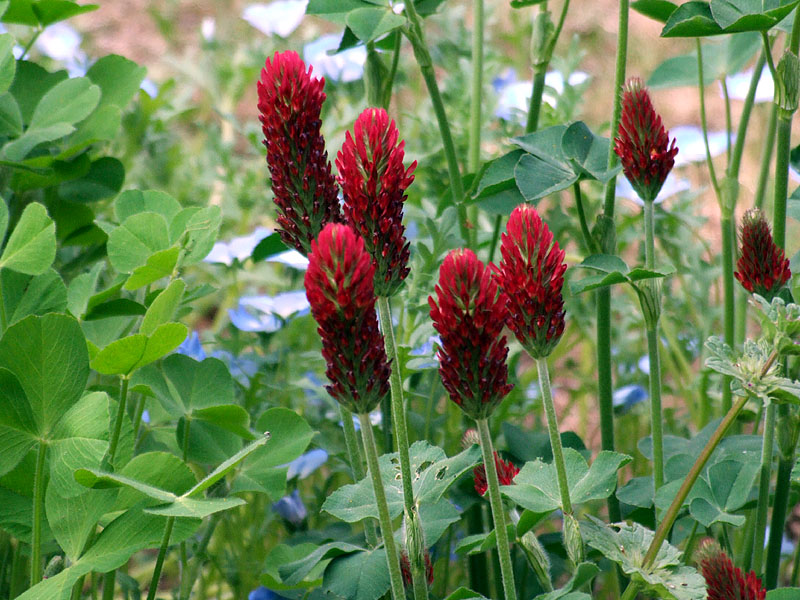
Cover crops, also called green manure, include grains like winter oats and cereal rye. Legumes, such as commonly used crimson clover, Austrian field pea and common vetch, are nitrogen “fixers.” Beneficial bacteria in legume root nodules take nitrogen from the air and supply it to the plant. When the cover crop decomposes, some of the nitrogen becomes available to other plants.
Make sure when you plant that the seed has good contact with the soil. Larger seeds like peas, vetch and cereals should be raked in lightly. Mix small seeds with sand to make them easier to broadcast and then use a sprinkler to water in. If the weather is still dry, keep the seed bed irrigated.
When it comes time to incorporate the crop, shorter plants can be tilled right into the soil. If the plant is too tall to turn under easily, mow first or use a weed trimmer. Tough-stemmed plants can be cut and left to decompose above ground. Or the tops can be carted to the compost pile and the roots dug in. Either way, let the turned-under material sit for about four weeks before planting.
For more information, refer to the OSU Extension guide Cover Crops for Home Gardeners. Or check out Cover Crops for Home Gardeners East of the Cascades and West of the Cascades; and Cover Crop Methods for Gardeners, all publications by Washington State University that Andrews collaborated on.
For beginners, Andrews advises:
- Start with a cover crop that is easy to grow and manage. For example, crimson clover is relatively easy to incorporate into the soil.
- The first time you try cover crops, plant them in an area of your garden that you can leave for vegetables typically planted in late spring or early summer. This will buy you time to learn how to manage the cover crop residues in spring.
- Try another cover crop that fits in a different niche of your garden plan after you have successfully used one cover crop. Then when you gain experience, experiment with others.
- Consider inter-seeding cover crops during the summer into late-harvested crops like tomatoes.